Super Pathfinding system icon

URP&HDRP Terrain Shader - Implementation Guide

Extensible lightweight terrain shader incluing Anti tiling, Snow, and other effects to make your terrain look superb.

Lod crossfading shaders intro image

Description


Effect showcase Effect showcase Effect showcase Effect showcase Effect showcase

Extensible lightweight terrain shader incluing Anti tiling, Snow, and other effects to make your terrain look superb.

The standard unity shader can be very limited as it does not include basic effects and does not allow for easy modification.
This is where URP & HDRP Terrain Shader comes in handy:
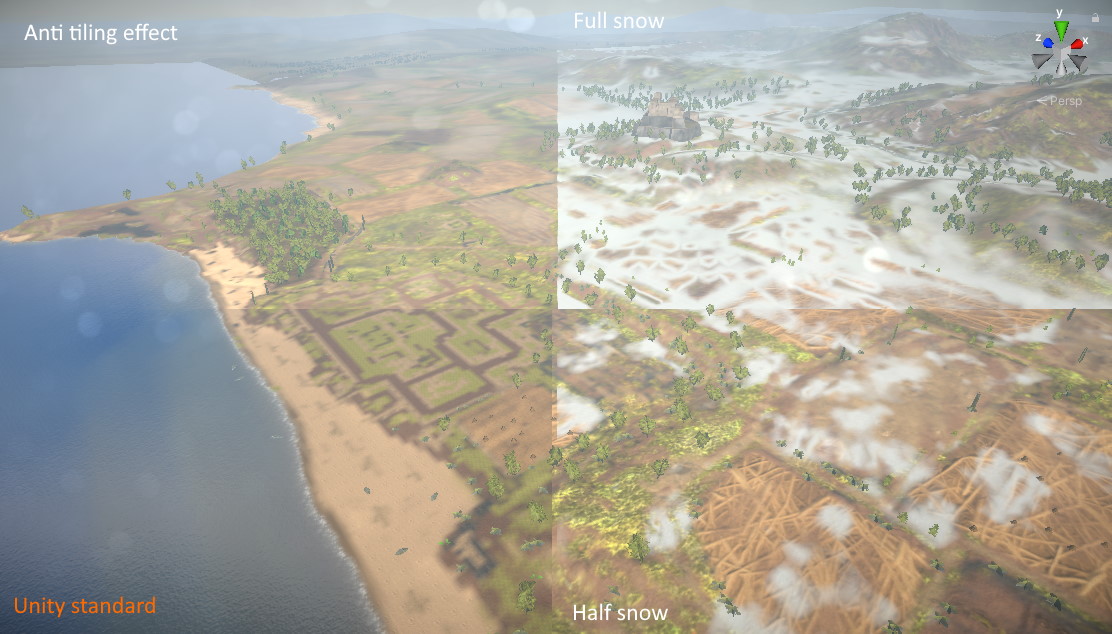
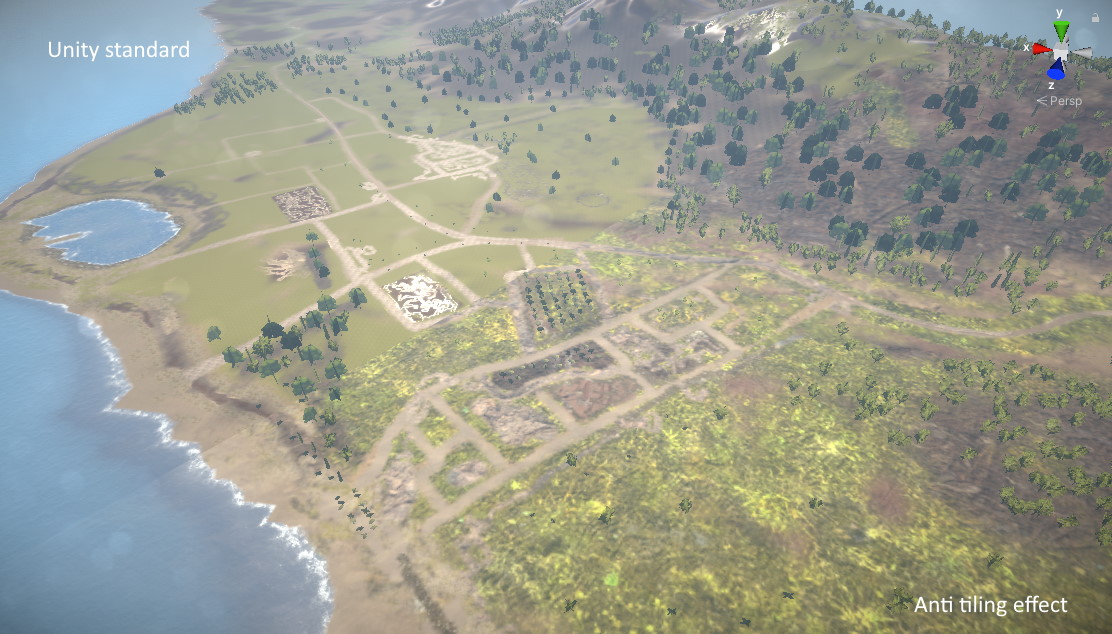
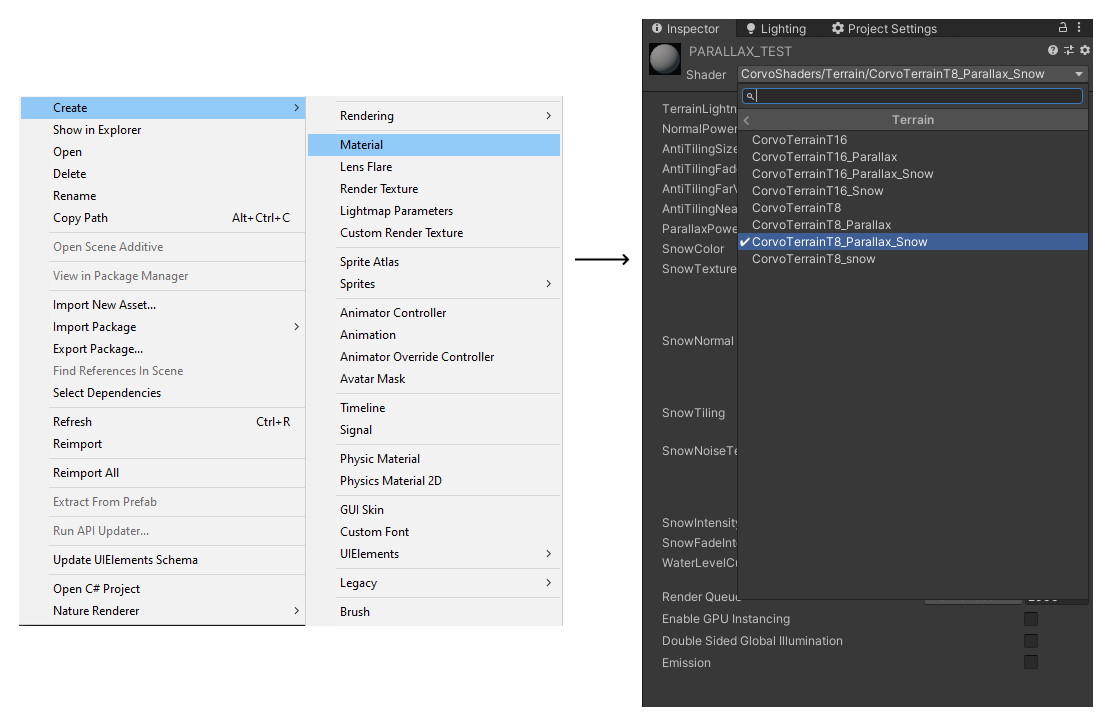
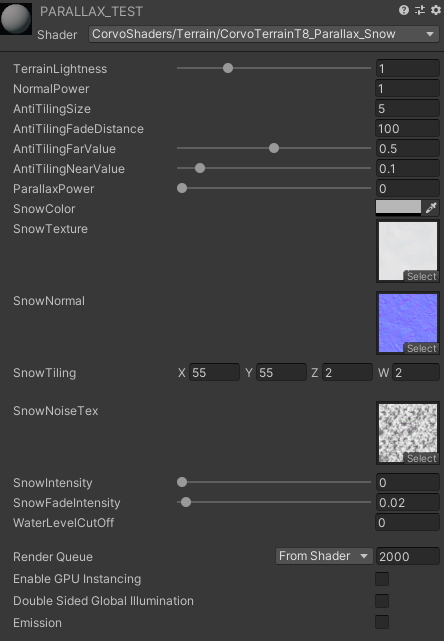
This new terrain shader includes some built in effects that can be modified directly from the material such as:
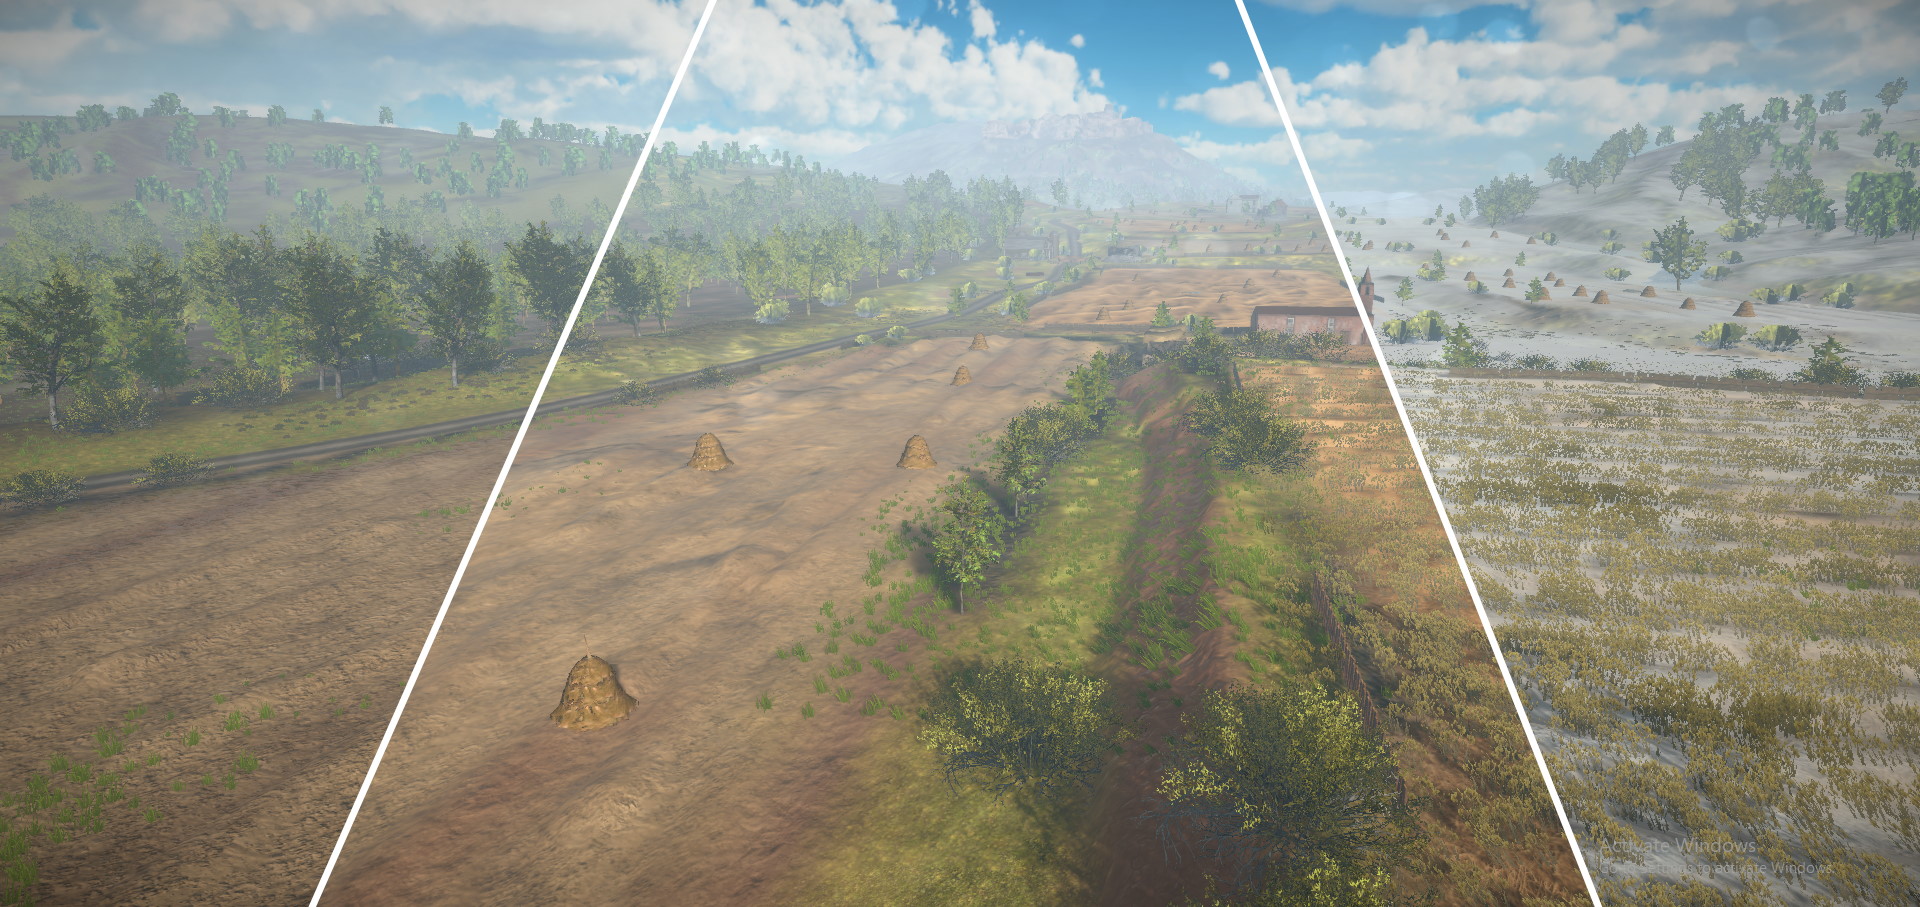
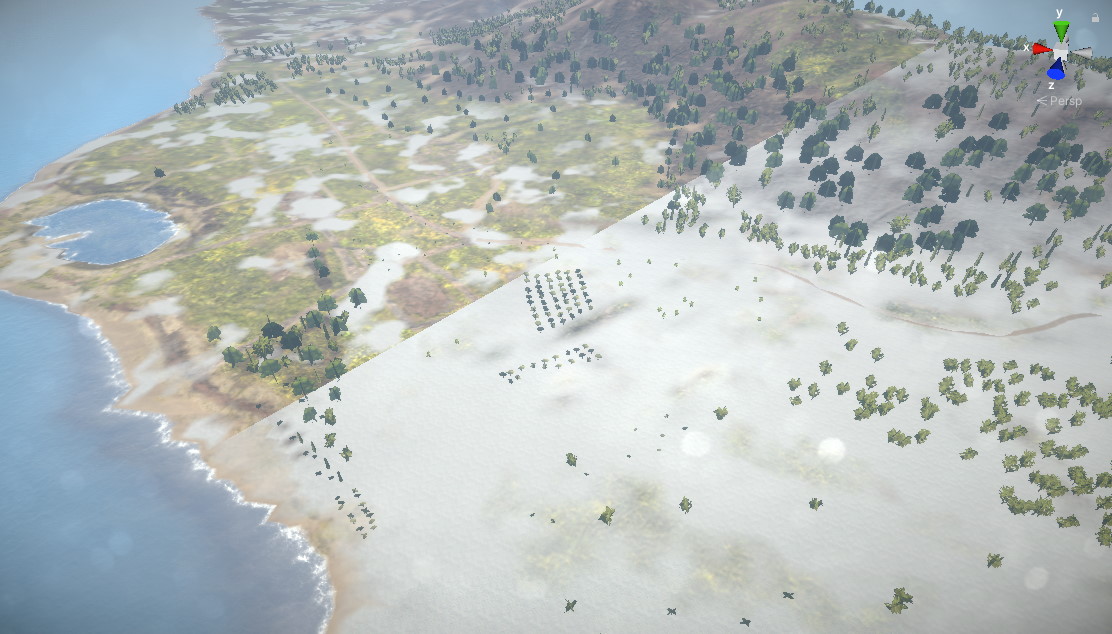
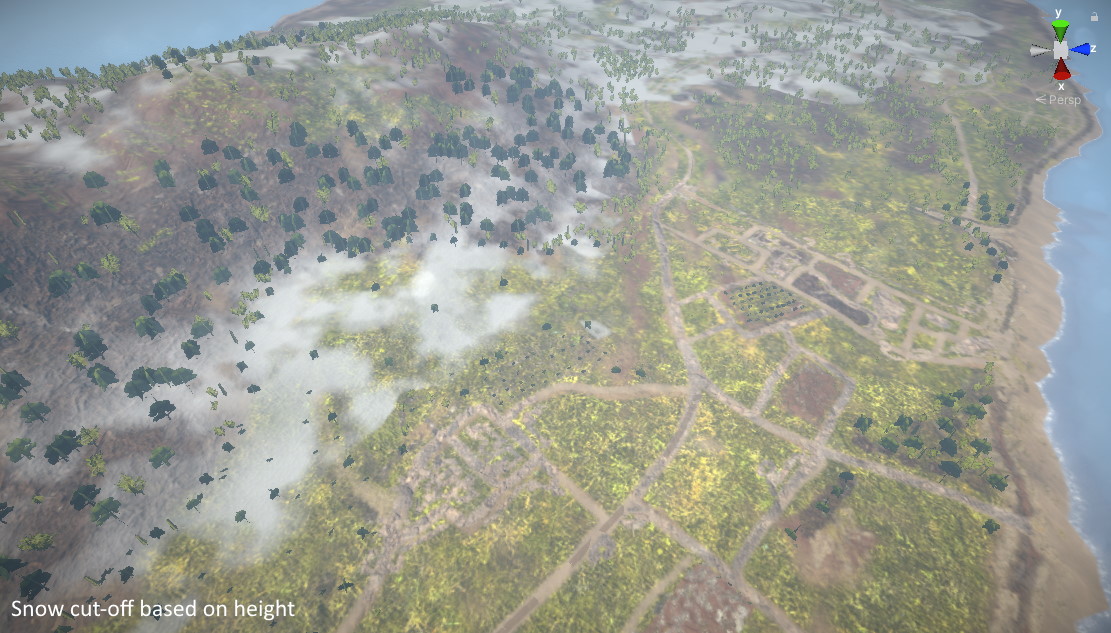
•Snow effect.
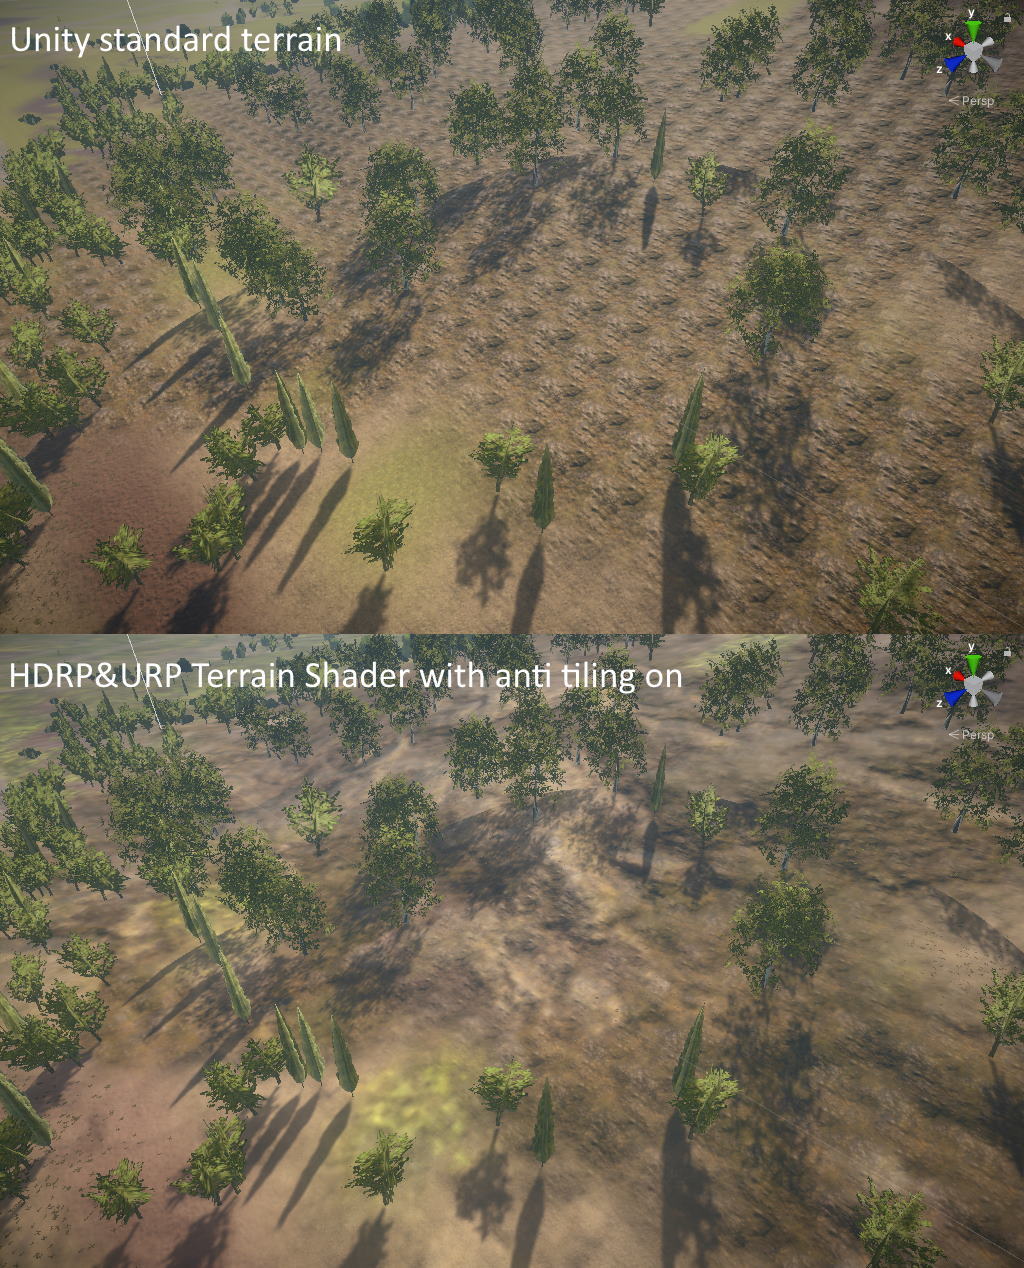
•Anti tiling effect.
•Terrain lightness.
•Normalmap intensity value.
•Tested on PC, Linux, Mac, Nintendo switch, but probably works on any hardware.
•less then 2 minutes setup.

The peculiarity of the shader, however, is that it is easily and highly customizable through unity's Shader Graph. Any desired effect will be easily inserted, and the buildt-in effects, easily editable to achieve whatever effect you need. All this without having to give up on performance: the shader in fact uses only 1 pass, unlike the unity built-in shader which uses 1 pass every 4 terrain textures.
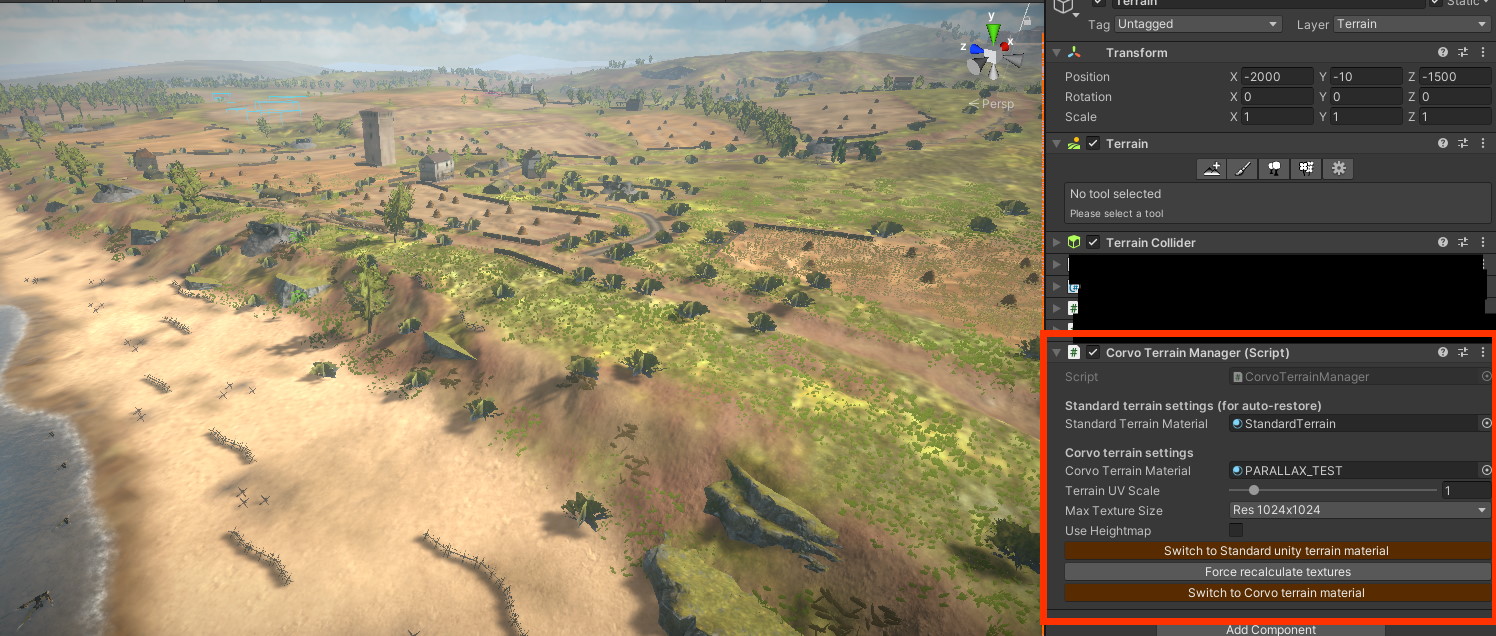
In addition, the shader includes a small terrain management script that will allow you to quickly switch from the standard unity terrain shader to the URP & HDRP Terrain Shader with 1 click, and to be able to change the resolution of the textures even at runtime, receiving logs on how much memory exactly the textures are. of the terrain are occupying.

Limitations:
-The shader currently supports a maximum of 16 terrain textures. If you need more textures in the ground it will be necessary to divide the ground into several parts with a maximum of 16 textures each.
It will reduce or even hide the popping for the Unity LOD System between different LOD levels, and even when the objects fades out in distance.

How does this works?
It is simply possible to replace the standard unity material with any material that uses this terrain shader, or a version modified by you. A script for the management of the material and the quality of the textures is included to simplify the management.

How is the performance?
The tests performed show that on each hardware the performance is comparable if not better than the standard unity shader.

How long does it take to implement it?
The implementation takes a few minutes, sometimes even a few seconds; There is no need to create alternative assets or textures that take up additional space in the project..


How to implement


  1. After importing the asset, create a new material and select the shader you need between the default ones (CorvoShaders/terrain/...):
    •CorvoTerrainTX: Standard lightweight terrain shader with basic features such as anti tiling effect.
    •CorvoTerrainTX_Snow: Lightweight terrain shader with basic features, anti tiling effect, and snow effect.
    •CorvoTerrainTX_Parallax(beta): Lightweight terrain shader with basic features, anti tiling effect, and lightweight Parallax effect (using mask map from terrain layer's as heightmap).
    •CorvoTerrainTX_Parallax_Snow(beta): Terrain shader with basic all features mentioned above. This is the heaviest of the shaders, but still it is incredibly optimized and performing.
    "TX" stand for amount of supported textures: T8 means that the shader support 8 textures, T16 means that the shader supports 16 textures. In future it's possible that more then 16 textures will be supported.
    To save memory and increase performance a little, it's suggested to select the T8 version of the shader when you don't need more then 8 textures.
  2. Select your terrain/terrains and add "CorvoterrainManager" component to it/each of them.
  3. Assign the created material to the "Corvo Terrain Material" property. [Optional] If you want to quickly switch back between the standard unity terrain material (or whatever material you was using) and the URP&HDRP terrain Shader material, you can assign the previously used material to the "Standard Terrain Material" parameter.
  4. Select the maximum textures size you want to support on the build (This can also be changed at runtime)
    Select the UV scale you need for the textures (1 means the same UV scales the standard unity terrain uses)
    If you are using a Parallax version of the shader, select "Use Heightmap" (if you are NOT using a parallax shader, to save memory do not enable this!)
  5. Press "Switch to corvo terrain material" and press Force recalculate textures
    You will need to call Force recalculate textures every time you make changes to the textures, the terrain layer or the CorvoTerrainManager component to apply the changes instantly. The changes are anyway automatically applied whene the scene is Played.
  6. Enjoy your new terrain material!
    If you need to edit terrain layers you will have to select "Force recalculate textures" to update the shader. This will be done automatically when playing the game.

How to edit shader parameters


There are many properties that you can edit on the terrain material both at runtime and in editor view. Do do so select the material (editor view) or use the functions Shader.SetFloat/SetBool/etc to change values based on the keywords.
It's also possible to change some properties directly from CorvoTerrainManager.cs, but this is explained into the scripting API section.

Notice: The following guide refers to the CorvoterrainTX_ParallaxSnow shader, wich includes all the features. If you choose other shaders, you will not see all of the features listed here.
Notice2: To edit metallic and smoothness of the terrain textures, just edit metallic and smoothness parameters of unity's terrain layers.
  1. Terrain lightness (Keyword: _Lightness): Edits the lightness of the terrain.
  2. NormalPower (Keyword: _Normal): Edits the normal intensity of all textures. You can change normal intensity for textures individually on standard unity layer properties.
  3. AntiTilingSize (Keyword: _AntiTileSize): Edits the size of the anti tiling effect. Anti tiling effect reduces tiling at distance to avoid repetition of the textures in large terrains.
  4. AntiTilingFadeDistance (Keyword: _AntiTileFadeDistance): Edits the max fade distance of the anti tiling effect.
  5. AntiTilingFarValue (Keyword: _AntiTileFarValue): Edits the intensity of the anti tiling at max fade distance.
  6. AntiTilingNearValue (Keyword: _AntiTileNearValue): Edits the intensity of the anti tiling near the camera.
  7. ParallaxPower (Keyword: ParallaxPower): Edits the intensity of the Parallax effect (beta).
  8. SnowColor (Keyword: _SnowColor): Edits the color of the snow when enabled.
  9. SnowTexture (Keyword: _SnowTexture): Set the texture of the snow.
  10. SnowNormal (Keyword: _SnowNormal): Set the normalmap of the snow.
  11. SnowTiling (Keyword: _SnowTiling): Edits the tiling of the snow texture. The first two values are te X and Y tiling of the snow textures, the third and fourth values are the X and Y tiling of the snow noise texture.
  12. SnowNoiseTex (Keyword: SnowNoiseTex): Set the noise map for the snow when the snow is not covering 100% of the terrain.
  13. SnowIntensity (Keyword: _SnowIntensity): Edits the intensity amount of the snow; 0 means no snow, 1 means max snow coverage.
  14. SnowFading (Keyword: _SnowFading): Edits the fade intensity of the snow on slopes, near water level and around snow noise corners.
  15. WaterLevelCutOff (Keyword: _WaterLevel): Edits the cutoff height of the snow effect to add snow only at a certain height (mountains or in general above water level).


Home
Contacts
Other Projects

© Corvostudio 2020